RED, WHITE & BUTTERCREAM: A PATRIOTIC CAKE
When it comes to bold colors and shows topping details, this vintage-style cake brings all the flair—and look. Whether you’re baking for a Memorial Day gathering, celebrating a hero in your life, or simply looking to perfect your piping for 4th of July, this step-by-step showcase will inspire your next bake by using vibrant Chefmaster Liqua-Gel food coloring.
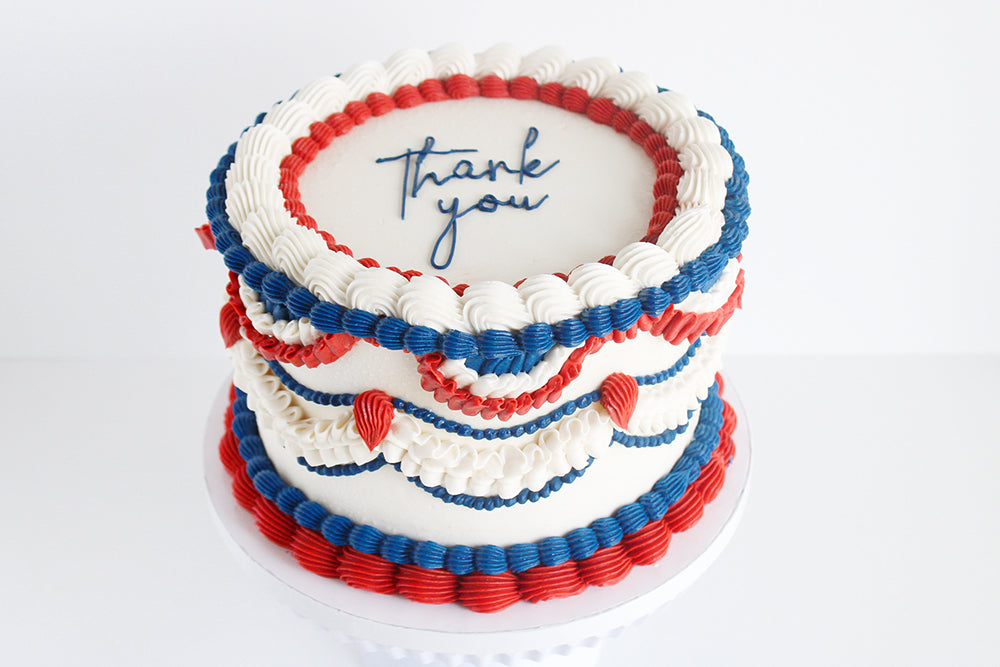
This all-American cake isn’t just a nod to classic charm—it’s a layered tribute to those we are thankful for. Dressed in red, white, and blue buttercream and decorated with beautiful piping techniques, the design is topped with a simple “thank you” message written in delicate navy lettering. Better yet, you’ll find a striking flag-inspired interior: rich red, soft white, and vivid blue cake layers created using Chefmaster Liqua-Gel colors. These high-performance food colorings gave us the depth and vibrancy we wanted without compromising texture or flavor.
The best yet, you can use a scratch cake, doctored cake mix, or just your average cake mixes to achieve this amazing look!
Ingredients:
Cake Batter:
1.5 cup (340g) Unsalted Butter (room temperature) (if using Salted Butter, opt out the salt)
3.5 cups (700g) Granulated Sugar
10 Large Egg Whites (room temperature)
2 cups (240g) Cake Flour
3.5 cups (420g) All-Purpose Flour
1 cup (240g) Sour Cream (room temperature)
2 cups (490g) Buttermilk (room temperature)
2/3 cup (128g) Vegetable Oil
2 Tbsp (26g) Vanilla Extract
5 tsp (26g) Baking Powder
2 tsp (10g) Salt
Buttercream Frosting:
(Makes approx. 6 cups)
5 cups Powdered Sugar
3 cups (6 sticks) Unsalted Butter (room temperature)
2 Tbsp Hot Water, Milk or Heavy Cream
1 Tbsp Clear Vanilla
1 tsp Salt (optional if using Salted Butter)
1 tsp Lemon Juice
2 drops Chefmaster Liqua-Gel Whitener
Chefmaster Navy Blue Liqua-gel© Food Coloring
Chefmaster Red Red Liqua-gel© Food Coloring
Tools & Utensils:
Kitchen Scale
Measuring Cups & Spoons
Stand Mixer or electric mixer
Bowls
Spatulas
8-inch round cake pans (ideally 6)
4-inch round cutter (or cut a 4” circle in wax paper to use as a cutting guide)
Turn Table (optional)
Palette Knifes and offset spatula
Pastry bags with piping tips (large star, ruffle and round)
Preparation:
- Cut your butter for both your cake batter and buttercream into small squares (about ½ to ¾ inch) and set aside in separate bowls to soften.
- Prepare and measure the rest of your ingredients.
- Preheat oven to 350 degrees F and line (or grease) your cake pans.
Prepare your Cake Layers
- Sift both flours, granulated sugar, baking powder and salt into a mixing bowl.
- In a smaller bowl, mix your buttermilk and sour cream until it is an even thicker consistency.
- Add your eggs, egg white, oil, and vanilla. Whisk until combined and set aside.
- Slowly add 1.5 cup of cubed butter to your dry ingredients while your mixer is on low.
- Once all your butter is added, turn up the speed 1-2 notches. Do not overmix this step, it should resemble wet sand.
- While your mixer is on low, slowly let your wet ingredients drizzle into the bowl. Scrape the sides and bottom halfway through. Mix until ingredients are just combined, we do not want to overmix here either! You may finish off by folding with a spatula to remove any excess lumps.
- Pour your white cake batter into 2 - 8 inch cake pans, filling them about ½ way. Bake for about 25 minutes or according to your cake recipe.
- Split your remaining batter into 2 separate bowls (2/3 in one and 1/3 in the other). Color the one with the most batter red and the other one blue using Chefmaster Liqua-gel food colors.
- Fill 3 cake pans with the red batter about ½ way. Fill 1 cake pan with blue batter almost all the way to the rim to create a thicker layer.
- Bake and let cool completely, then level your layers and set aside.
-
- Note: if you only have one or two 8-inch cake pans, just bake the various layers in separate batches, washing your pans in between.
Make your Buttercream Frosting
- Using a Whisk attachment, whip your room-temperature butter for about 5-10 minutes until it becomes bright white and fluffy. Make sure your butter turns white before proceeding to the next steps or else you will get a strong taste of butter.
- Start to slowly add about a cup of powdered sugar at a time while your mixer is on low. Stop mixing as soon as the powdered sugar has combined with the butter.
- Add in your vanilla, lemon juice and salt and a touch of pink food coloring to start.
- Turn your mixer on medium speed. While it whips, slowly drizzle in your warm water or cream.
- Switch to a paddle attachment and let the mixer run on the stir or low setting for 10 minutes.
- Split your buttercream into 3 separate bowls, about 50/25/25 ratio, the white being your majority.
- Dye your two bowls, one red and one blue. After mixing use an emersion blender to deepen the color or make a day in advance to let the color settle.
Assemble and Decorate your Cake
You'll need:
2 - 8-inch White Cake layers
3 - 8-inch Red Cake Layers
1 - 8-inch Blue Cake Layer
White, Red and Navy Blue Buttercream
- Stack and fill:
- Starting with your cake board and a small amount of buttercream, layer one red cake layer, one white cake layer, and another red cake layer on the top, adding a thin layer of buttercream between each layer.
- Take your blue cake layer and using a round 4” cutter, cut out the center and separate it from the outer ring. Set aside.
- Repeat cutting the center off your remaining red and white layers. Keep the centers of those and set aside the outer rings. (You can use your leftovers to make patriotic cake pops.)
- Carefully place your blue cake ring on the top of your cake stack.
- Add in your small white circle in the center of your ring. Place the red circle on top.
- Frost and decorate:
- Use some white buttercream to crumb coat and chill.
- Once chilled, add on your final layer of white buttercream and return your iced cake to your refrigerator or freezer to chill until the base if firm to the touch.
- Use piping tips to create vintage-inspired shell borders, scalloped garlands, and star drop details. We used multiple piping tips. Feel free to get creative and go full parade float on this one!
- Using your remaining blue buttercream and a steady hand (or stencil) to pipe a heartfelt “thank you” on top. This is the perfect finishing touch for anyone who deserves a little extra gratitude.
First Slice: A Showstopper Inside & Out
Cut into this cake and reveal a stunning interior that’s just as bold as its frosting. The layered red, white, and blue mimic the American flag, while the rich buttercream brings the whole look together.
This cake is as meaningful as it is delicious—and made even better with Chefmaster’s reliable, vibrant colors that help your designs shine.
DOWNLOAD PDF