RED VELVET VALENTINE’S BROWNIES
What is better than a gooey decadent chocolate brownie? A red velvet decadent chocolate brownie.
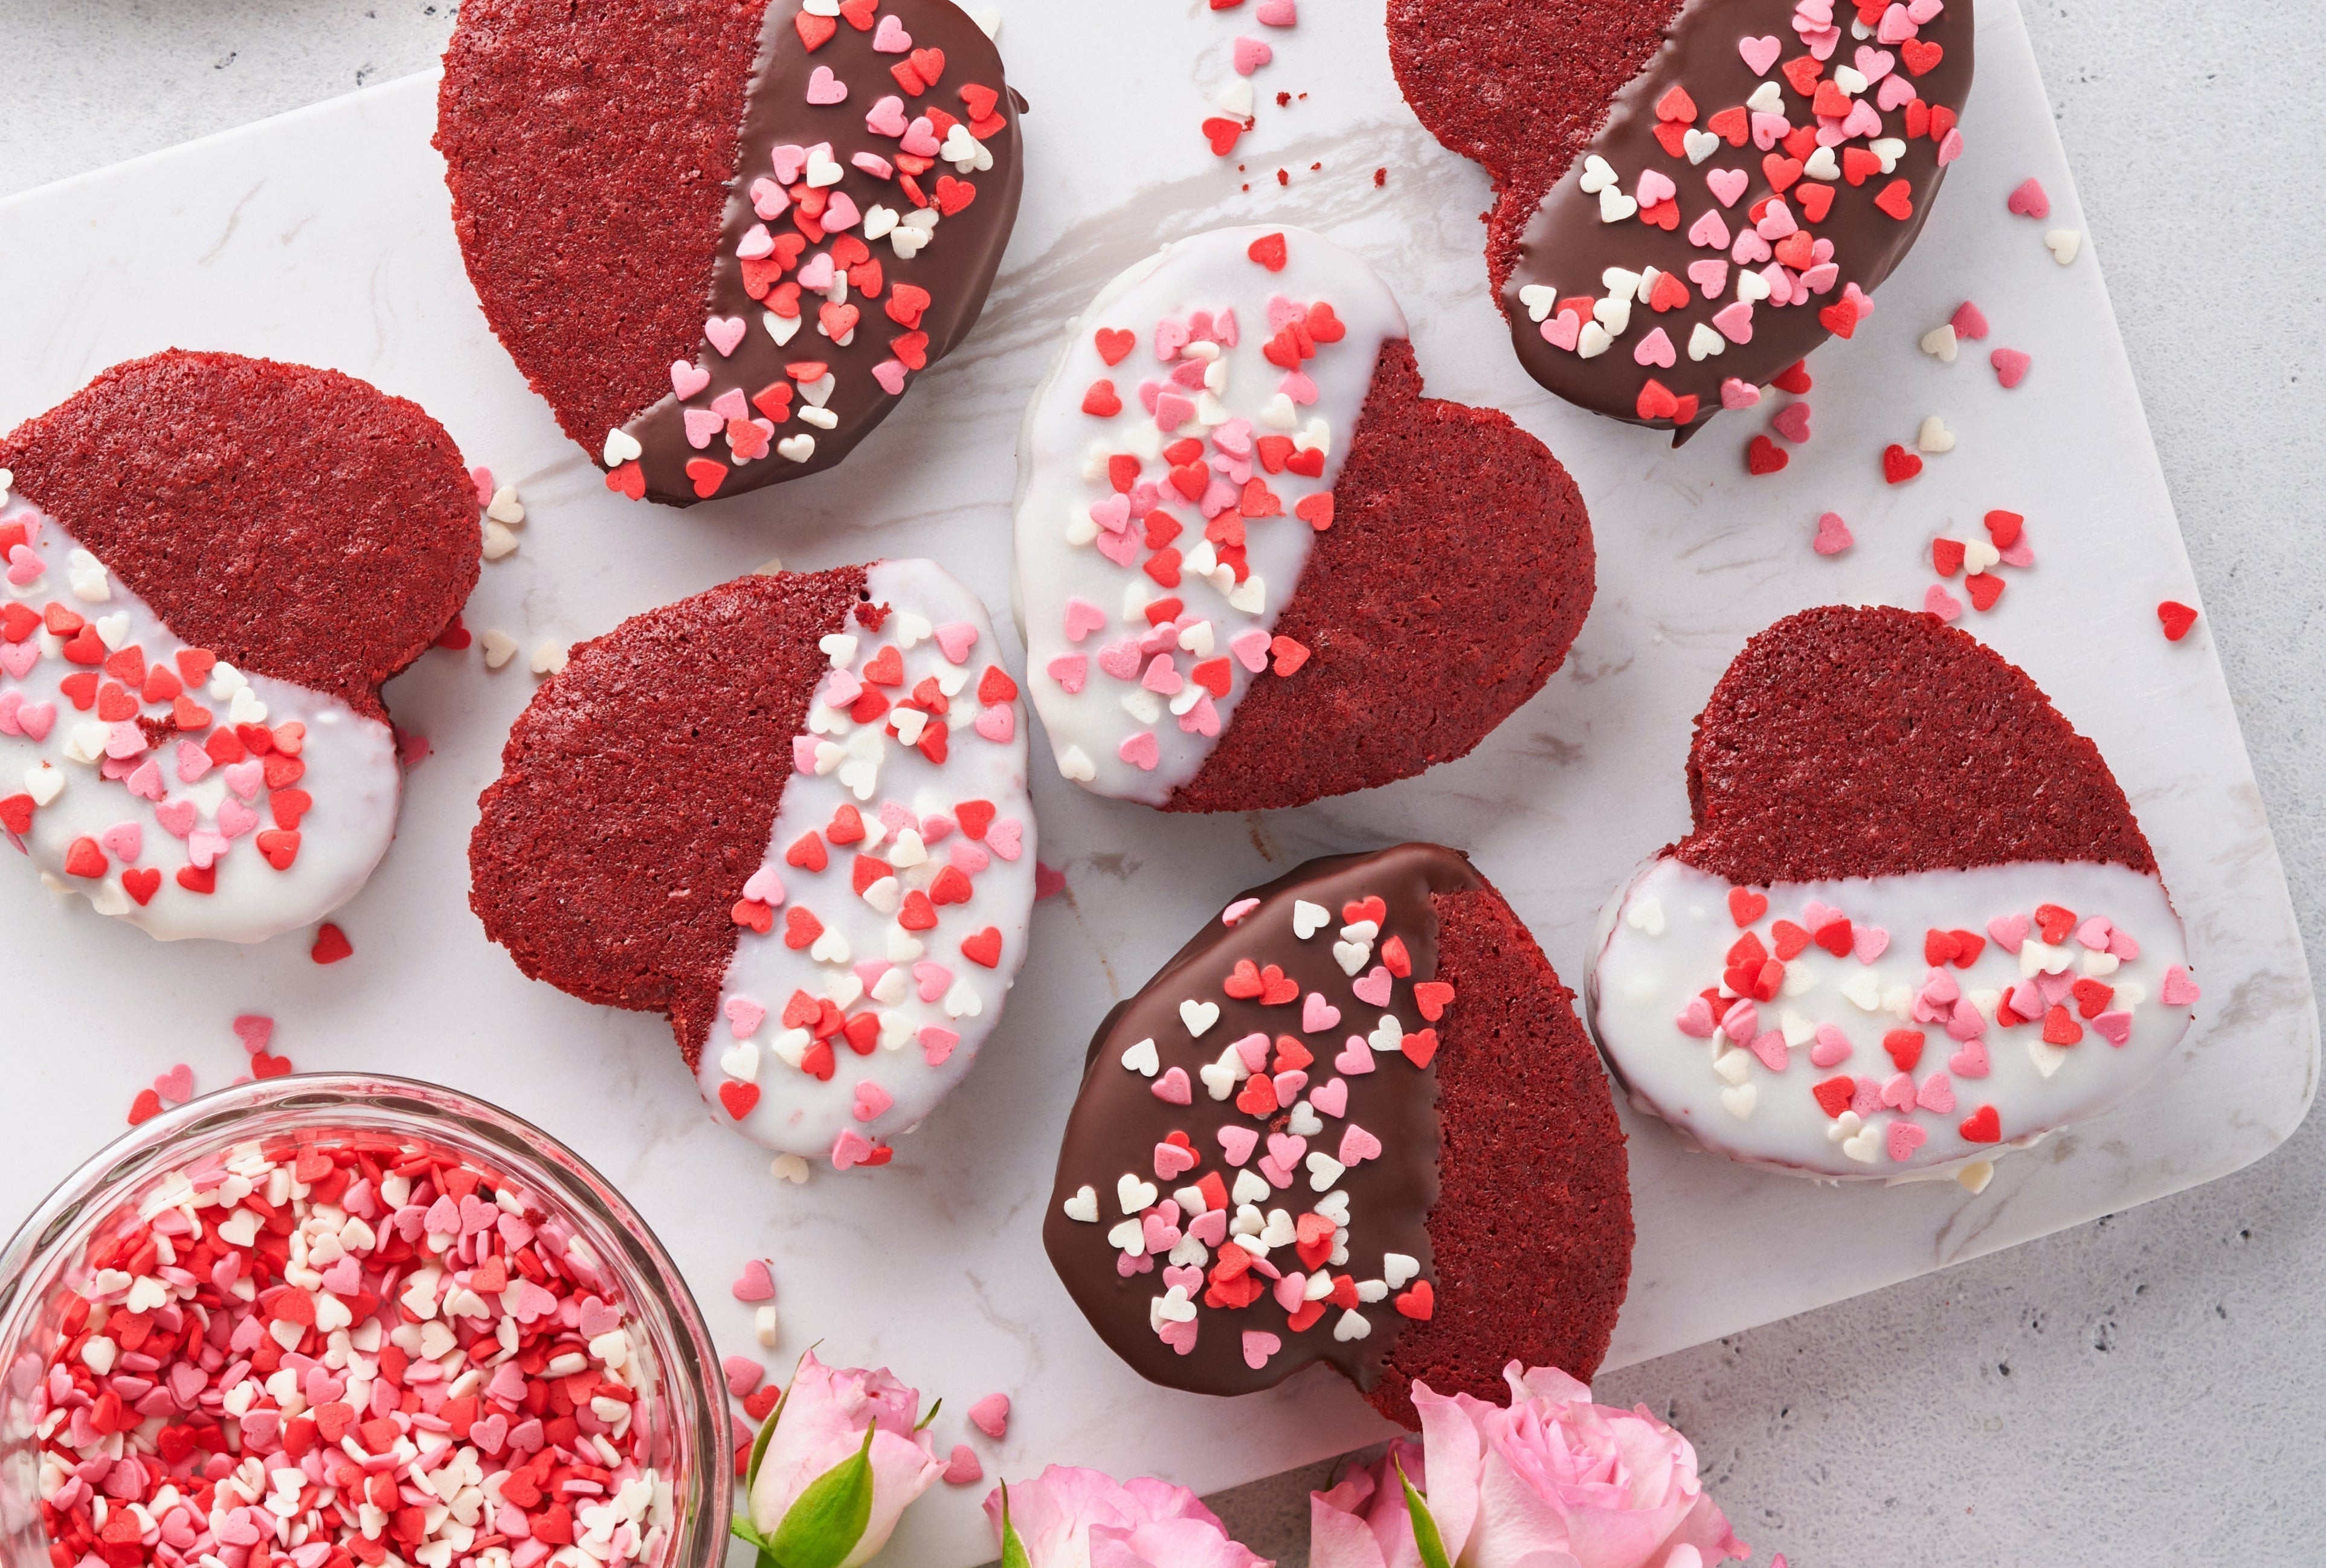
Cut your brownies into heart shapes rather than rectangles or squares, dip them in chocolate and sprinkle some crunchy and colorful sugar hearts on top… Voila! A perfect Valentine’s treat everybody will love.
Ingredients:
1 ½ cup Sugar, granulated
1 ¼ cup Flour, all-purpose
½ cup Butter, softened (unsalted preferred), cut into small squares
2 Eggs, large (room temperature)
3 Tbsp Cocoa Powder, Dutch process
1 Tbsp Chefmaster Super Red Liqua-Gel® food coloring
¼ tsp salt (omit if using salter butter)
Baking Oil Spray
For decoration (optional):
8 oz Milk Chocolate Melting Wafers
8 oz White Chocolate Melting Wafers
Valentine’s Sprinkle Mix of your choice
Tools & Utensils:
1 Stand Mixer with a Whisk attachment
2 Small Bowls, microwave-friendly
8 x 8 baking pan, or brownie pan
Spatulas
Parchment paper
Toothpicks (or Cake tester)
Wire cooling rack
Kitchen scissors
Small kitchen knife
Baking Sheet
Cutting Board
Waxed Paper
Small heart shape cookie cutter
Preparation:
-
Prepare and measure all your ingredients.
-
Preheat oven to 350°F.
-
In the bowl of your mixer, beat together the softened butter and sugar on medium low speed, until light and fluffy, approx. 2 to 3 minutes.
-
Add Dutch process cocoa powder and beat on medium low speed until well combined.
-
Add Chefmaster Super Red food coloring and continue beating on medium low speed until color is well dispersed. If using an extra dark cocoa powder, you might need to incorporate additional Chefmaster Super Red food coloring in your batter to reach the desired batter color.
-
Continue beating on medium low and incorporate eggs one at the time making sure the first egg is well combined before adding the second one.
-
Add flour and salt and mix on low speed until the batter is well combined. Do not overmix.
-
Prepare your baking pan:
-
Spray your pan with baking spray.
-
Cut a piece of parchment paper about 2 inches wider and longer than your pan.
-
Put paper at the bottom of your pan and cut a slit in the corner with scissors to create folds.
-
For an even easier release after baking, spray the top of your parchment paper with baking spray.
-
Pour and level batter into prepared baking pan.
-
Bake for 35 to 45 minutes or until center of the brownie starts to set and a toothpick or cake tester inserted in the center of the pan comes out clean.
-
Quickly remove brownie from oven.
-
As soon as the brownie is cool enough to remove from the baking pan, transfer it on a wire cooling rack.
-
Let cool completely.
Decoration:
-
While the brownies are cooling, line a baking sheet with a piece of waxed paper.
-
Once cooled, remove the parchment paper from under the brownie and transfer onto a cutting board.
-
Using your small heart shaped cookie cutter, cut brownie hearts by applying medium pressure. Your cookie cutter might not be deep enough to cup all the way through the brownie. Use a pointy knife to finish cutting through the brownie while carefully following the intend made with the cookie cutter.
-
Repeat and cut as many hearts as you can in your brownie cake.
-
Carefully remove the batter around the heart-shape brownie and set aside to eat as a treat or to make cake pops, if desired.
-
Pour 8 oz of melting chocolate wafers into a small microwavable bowl and melt as instructed on the package.
-
Dip brownie hearts halfway in melted milk chocolate. Set on baking sheet covered with waxed paper. Immediately sprinkle decorative jimmies on top.
-
Repeat step 6 and step 7 with melting white chocolate wafers.
-
Let cool your dipped red velvet heart brownies completely.
-
Serve as is or pack these delicious treats in a cute food approved cellophane bag or favor box for an easy Valentine’s Day giveaway.
Enjoy!
DOWNLOAD PDF